 +38 (097) 914-16-23
 +38 (063) 406-76-84
 info@led-avto.com.ua
Repair and installation of electrical equipment on cars
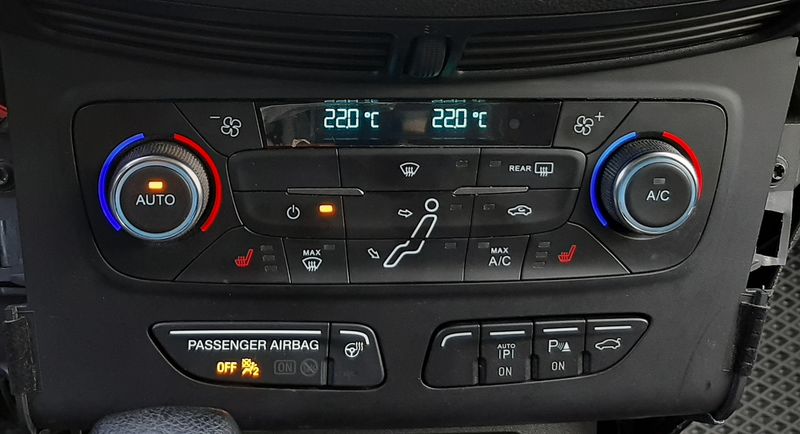
Installing dual-zone climate control on a Ford Escape 2017 2.5L S
May
Greetings to all readers!
Today we will talk about, what it takes to replace the conventional manual air conditioning control with a two-zone automatic in a Ford Escape 2.5L S 2017 of the year.
Required kit:
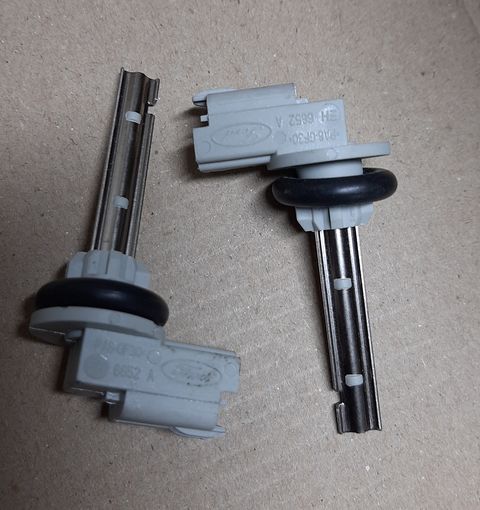
- Light sensor – AM5T-19E663-AC
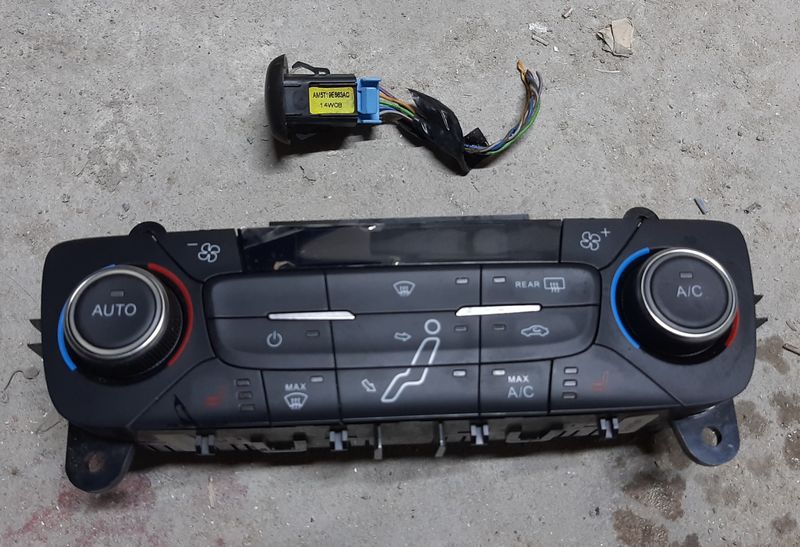
- Climate control panel – GJ5T-18C612-DG
- Air ducts to the back row – GJ54-S01903-DA и GJ54-S01906-FB
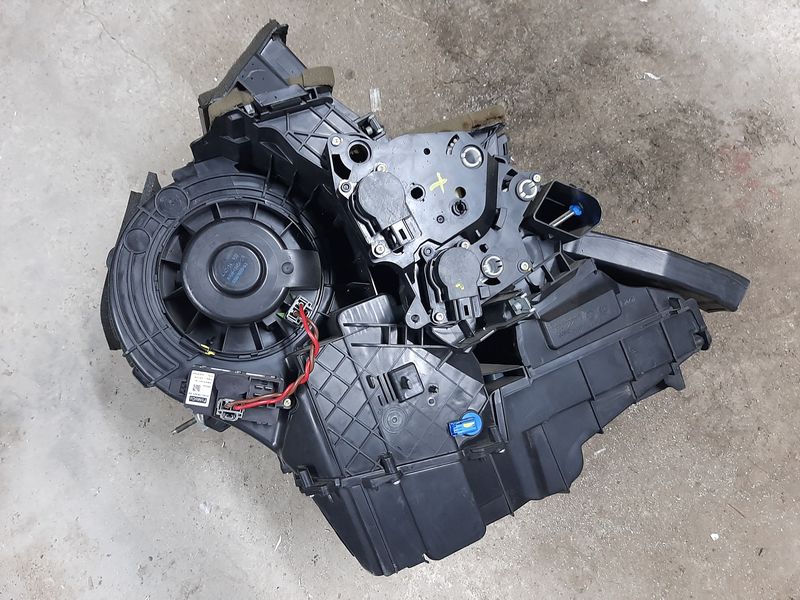
- Air conditioning unit -DV6N-19B555-NH
- Temperature sensors – 4 PCS
- Deflector in the armrest.
 |
 |
 |
 |
 |
And also the availability of all kinds of tools, consumable (wires, thermosetting, terminals, ties and tape) and the hands that will do it all.
Briefly step by step:
- Disassembly: seats, center console, steering wheel, torpedo;
- Replacing the air conditioner (ovens);
- Rewiring electrical wiring;
- Changing the central configuration.
- Checking the operation of all mechanisms and devices;
- Assembly.
I’ll tell you the first stage quickly.
|
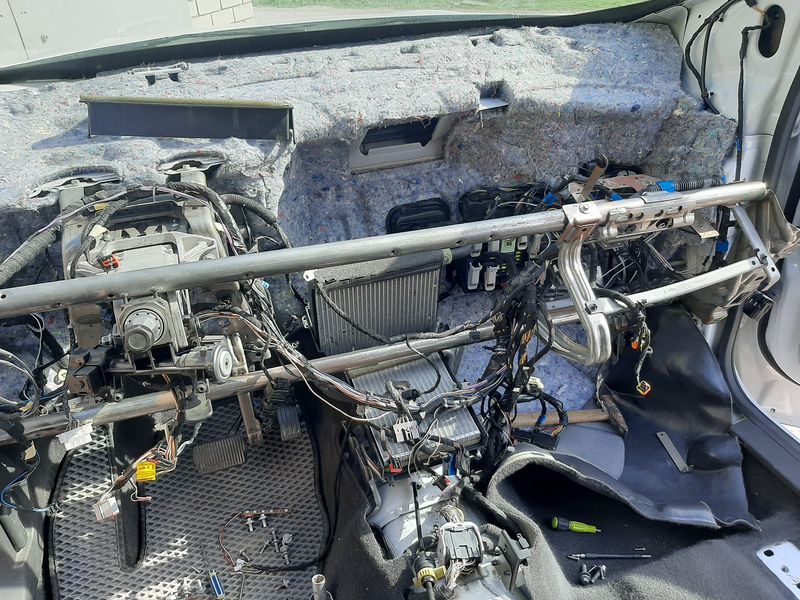
We remove both seats, to do this we unscrew 4 bolts from each. Disconnect the connectors under the seats. Unclip the side panels on the center console, having previously unscrewed the mounting screws in the front part. Unscrew and remove the glove compartment. We dismantle Sync and the air conditioner panel with buttons. Removing the steering wheel and dashboard. Remove the plastic on the side pillars and unscrew the two screws securing the trim to the dashboard (along the glass), let's take it off (on the left side, disconnect the connector for the light sensor) We unscrew all the torpedo mounting bolts, there are about a dozen of them. And there is one mounting clip under the dashboard (behind the locker) cm. photo. |
 |
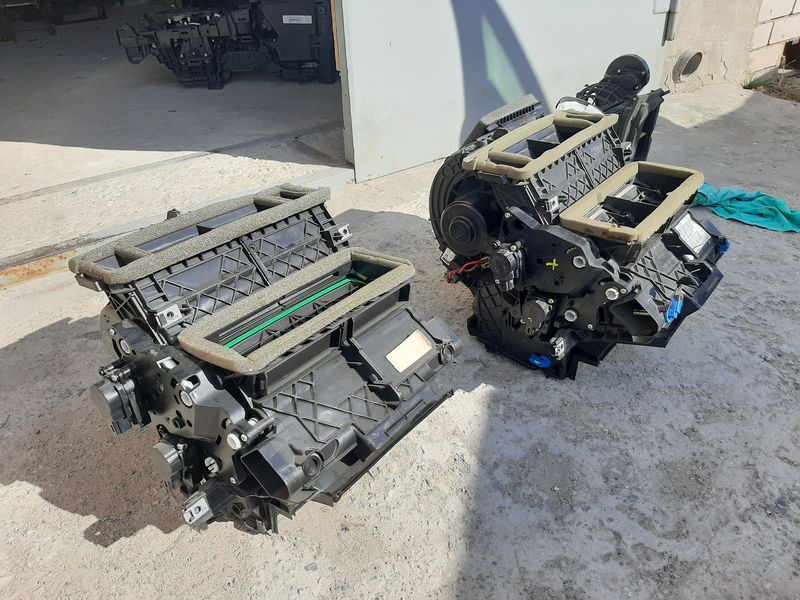
The next step is replacing the air conditioning system.. I thought for a long time about you
drag her, without removing the heater and evaporator radiators, in addition, it also rests against the transverse stiffening pipe. After examining the new stove, I realized that it can be divided into two parts.
The bottom that will remain with the radiators, and the top which I will put a new one. But there is one screw that is in a hard-to-reach place. S
With difficulty and by touch, using a flexible screwdriver attachment, I finally unscrewed it. Well, the pipe with a rigid frame needs to be removed cm. The video clearly shows the mounting locations. Replacing what it says BOLT ON, but I can’t find that hard-to-reach screwg screw back, It's OK.
Pay attention to the sensor that is inserted between the radiator cells, when I took it out I almost tore it off. If you do not have it on a new installation, then you need to rearrange it. Now you can assemble the entire hard part, not forgetting to install air ducts for the rear row.
 |
 |
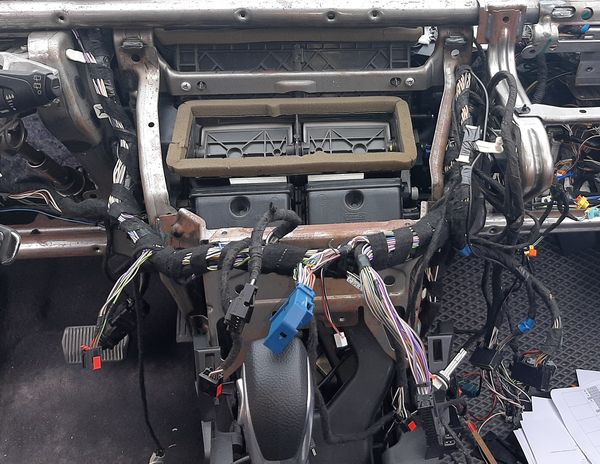
Let's take the diagrams, wires and begin to assemble the electrical part.
|
The first thing I noticed was the power fan control harness and its connector on the side of the HVAC unit (manual control). In the case of climate control, the fan is controlled from the HVAC unit (new) which does not have a power control unit, so we either hide it or remove it and repin the fan connector and add a control wire. Next, add wiring to 4 temperature sensor, 2 dampers and light sensor. Additional pins will be needed in the connectors of the HVAC unit. You can go another way – buy under-torpedo wiring with climate control and simply replace it… |
 |
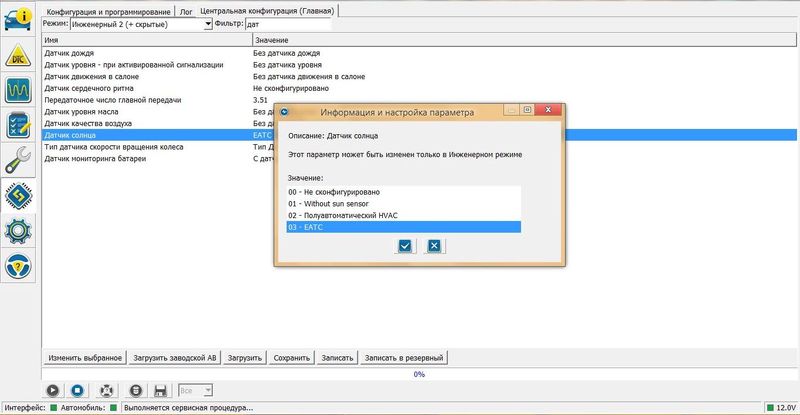
Editing the config. At this stage, you need to either turn to those who know what to do, or do it yourself. I connected with forscan and changed two parameters:
 |
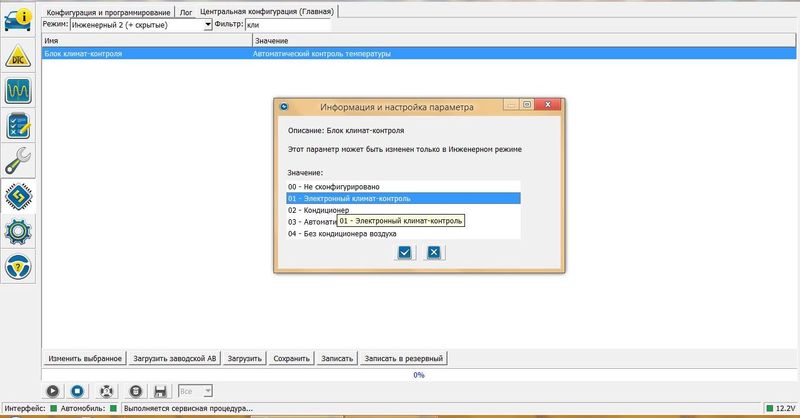 |
I thought that everything, but the blower fan didn't start.. As it turned out later, there is one more parameter that is only available through UCDS and it concerns the fan. By changing its value the fan started working….
| There is still one unresolved issue, the air intake flap is not working. Everything is in the climate panel, I have it from Focus 3 and in Kugu or Escape it does not flash properly. To check, we removed the socket from another car., They connected it to me and as it turned out everything works great, i.e. all electrical parts are assembled correctly. | |
Next was the assembly process, but before starting it, I laid more wiring for keyless start (Ford Power) and for electric (EPVS), But that is another story…
Anyone interested in doing this work, please contact contact data.
Thanks for the help fuel-ex and Damon-Ocean.
Publication of an article is allowed only with a link to the source.